Gimmie Some Sugar! Old Family Recipes Shared! Enjoy!

Thursday, December 22, 2011

Peanut Butter Cookie Pie Pt. 1

This is labled part one because I followed the recipe to the T, and I think it could use some tweaking. When I do it again, I'll post it, with the tweaks. This turned out great, but I think it needs more peanut butter and more sugar. If you read this and make some tweaks, comment and let me know how it goes!

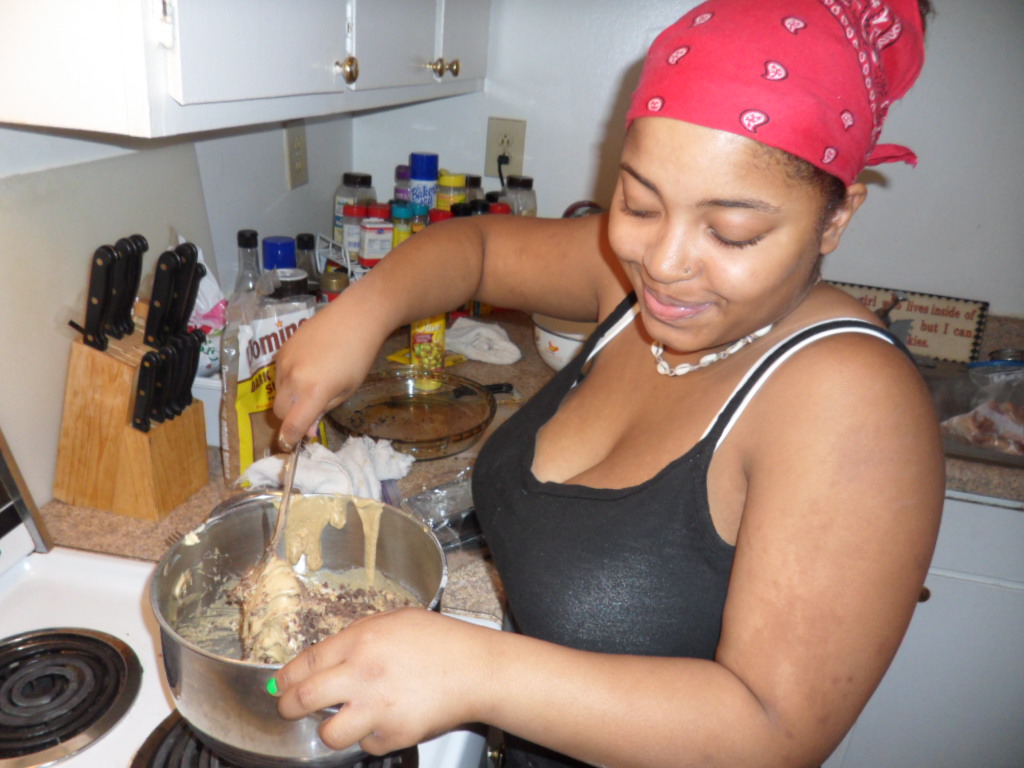
Ok, let's get started! First let me introduce my assistants!
My youngest daughter, Amber and one of my adopted kids from the neighborhood, Zoe. 
This recipe makes 2 pies. So get out 2 pie crust and throw em on a cookie sheet.
 Preheat your oven to 325.
Add 1 Cup of softened butter to the mixer and beat until creamy.
Add 1 Cup of Dark Brown Sugar to the butter.

Add 2 Eggs one at a time to the mixture. Mix well after each one.

Measure out 1 Cup of Dark Brown Sugar, 2 Cups of All Purpose Flour and 1Teaspoon of Baking Soda. Set aside.

Scrape the sides of the bowl down well.

Add to the mix 1 Cup of Peanut Butter. 

 Mix it up!

 Add the Flour that you set aside to the peanut butter mixture.


 The mixture will be thick. So to make this even more awesome in my mind, I was thinking....
 Add Peanut Butter Chips to it!


 Mix, mix, mix! Use your 2 best tools, your hands!

 Divide between 2 unbaked pie shells.
 Flatten it all out. I cant think of a technical term to use, so just slap it in there and try to make it as level as you can.

 So...I was thinking...peanut butter cookies. Lets go old school! So we grabbed 2 forks and made the old school thatch marks on top!!

Then I was thinking...old school peanut butter cookies are rolled in sugar...sprinkle some sugar on top!!

Throw em in the oven! Bake for 30 minutes.
There are no finished "ta da" pics of this one, cuz they cut into it immediately. In my opinion, it needs more sugar and more peanut butter. It is good, but I think I can make it really awesome next time. If you make this, remember to post! I wanna know how it comes out!!

~Megan

Heath Bar Cookie Pie

Ok, in my kitchen, I have tons of cookbooks, and such and I always follow a recipe to the T the first time. After that I do my own tweaks. This is my tweak to a Nestle Cookie Pie. Yes, the original is to die for, but I know you will just Loooove this! This is a new favorite in my house!

Quick note, I bought deep dish pie shells by accident, so the pies weren't all the way full. Im going to give you the recipe for one pie, but you'll be better off making two once you taste it!
Ok, lets go!

Preheat your oven to 325.
Beat 2 large eggs until foamy.


In another bowl add the following-
1/2 Cup Granulated Sugar
1/2 Cup Dark Brown Sugar
1/2 Cup All Purpose Flour

Mix and add to the beaten eggs.
Then it will look like this.
Scrape the sides of the bowl.
Add 3/4 Cup Softened Butter to the mixer.
Mix butter in well. 
Scrape the sides of the bowl and remove from mixer (if you have a stand mixer that is).

To the batter add 1 Cup Of Semi Sweet Chocolate chips and 1 Cup of Heath Bar pieces.
Mix well and add to an unbaked pie crust. Again, this will not fill a deep dish pie shell, but Im a rebel and did it anyway. LOL

So this is already gonna make you wanna slap your momma, but if you really wanna go balls to the wall... do what I did..
Add more Heath Bar pieces on top!!  Ok, throw that bad boy into your preheated oven and bake for 45-50 minutes.

 When it comes out it looks like this...

This has a crispy top and a chewy gooey inside that will every choco-holic will love! Make this once, and they will asking you when you'll be making it again! With only a few ingredients it's pretty easy. Try it with other candy bars, just think about it, butterfingers...snickers would be fantastic!! Oh, Im gonna have to get on that one myself. If you try any, let me know how it went!!

She survived the first holiday dessert! She was so proud of herself! This is my daughter, Nyambi.


Would love your comments, questions and suggestions!!

~Megan


Kids In The Kitchen!

I am a firm believer in getting the kids into the kitchen. I have found that you can get them to try new foods if you get them to help you prepare meals and they are more likely to continue to try new things. They feel rewarded when they have seen what they have created and I love to watch their faces as simple ingredients come together before their eyes.
And in baking it's a math and a science class all in one. There are formulas to baking. And I find the best way to challenge my little darlings is to double a brownie or cookie recipe and have them figure out the right measurements. Hey, if they get it right, they get to lick the spoon or have the first bite of whatever they have concocted.
Im also writing this post because it's the holiday season and the next few posts that I will be adding include kids in the kitchen. My daughters and their friends. I woke up to seven kids this morning all wanting to bake something. The neighborhood kids all call me Momma Megan and Deidra, Momma Deidra. They are cute kids, and are so helpful.
So get some kids in the kitchen! If you don't have any Im sure you have a niece or nephew or a neighbor kid that would love to be able to add to or mix up something!
Have fun with em!

~Megan

Wednesday, November 23, 2011

Herbalicious Turkey

This is a step by step on my Herbalicious turkey. Dont like cooking turkey cuz it just takes too darn long? Try this! You wont be disappointed!

First things first pre-heat your oven to 425. Yes, I said 425. Trust me. Then you will need the following-

  • 2 sticks of butter
  • healthy handful of thyme
  • healthy handful of basil
  • sea salt
  • garlic powder
Add the 2 sticks of butter to a microwave safe bowl and nuke until melted.

Once its all melty and smelling good, add all of the spices above into the bowl.
Mix up all the goodness and then throw it in the freezer. Yup, the freezer. This is what it looks like after it freezes and is ready to use.
Ok, now for the turkey. Wash and get all up in there. Take that stupid plastic thingy off of the legs.
Ok, heres the secret, get a sharp knife and cut the backbone out of the turkey. Trust me, it will seriously cut down on cooking time. This bird in question is 20lbs. And will cook in under 2 and a half hours. Promise!
So here it is with no back bone.
Yeah, its kind floppy, but its ok. Here's what you grab next.

  • 1 carrot
  • 3 celery stalks
  • 4 cloves of garlic
  • 1/2 an onion
Rough chop it all.

Now its time for the fun part. Really getting up close and personal with your bird. What you wanna do is get all up under the skin to make pockets for all of the goodness . Make pockets under the thigh skin and the leg skin.
Next start adding the frozen herbed butter under the skin in the pockets you just made. We're building the goodness! Ok, hers what it'll look like.
Yeah, it looks crazy, but we're not done. Next add all the veggies under the turkey. We're building more goodness, plus the gravy from this will be awesome!
Next drizzle the skin with a little olive oil and sprinkle all the herbs that you added to the herbed butter onto the bird.
See, now we're getting somewhere. Throw this bad boy in the 425 oven til the skin starts to brown, like this.
Then I add either some water or some chicken broth, throw the lid on the on the roaster. Lower the oven temp to 325. If it'll make you feel better you can add the turkey timer thingy in the breast if you dont believe me that it wont take hours and hours to cook.
Once its done, I threw mine under the broiler for a few secs after I basted it with all the juices. (My fam loves the skin). This part is optional, but it makes it good!
And voila! Its done!
Enjoy!!

~Megan~